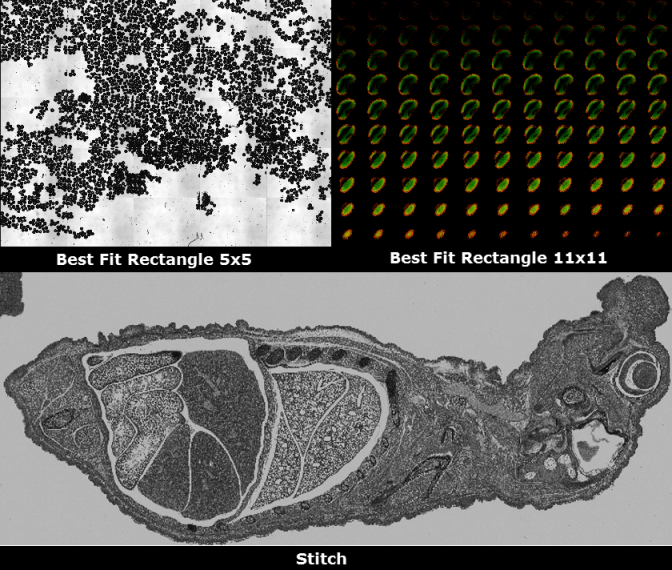
The Data Document replicates a Montage Display of selected images. The Montage can be setup to create 1, 2 or 3-dimensional views of all or selected portions of the image data in the file.

The image Montage controls include the following:
You may access the Montage menu via the drop-down menu on the Montage toolbar or by right-clicking on the image view when the Field Image Montage node is selected in the Data Document Tree. The Montage Menu provides access to functions that control and utilize the Montage Image.
Create a montage setting the characteristics via the Montage Properties dialog. Create a quick montage by selecting one of the options below:
Create a new Data Document containing a 3-D movie of the Montage. Create a quick movie by selecting one of options below:
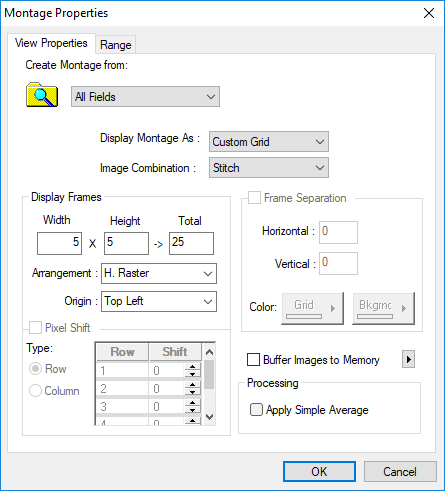
The Montage Properties dialog allows the user to select the type of montage to display and define the parameters.

The View Properties tab provides the tools for creating a montage. Users have the option of selecting one of the montage presets or defining their own custom style.
Click the drop-down list "Display Montage As" to display a list of styles:
As images from the Data Document are placed into the Montage Image, some processing can be applied. The processing operations available include:
Note: When acquiring images for stitching, make sure to include an overlap of atleast to 10% in the X and Y direction.
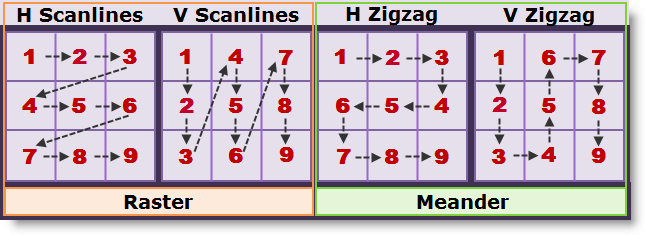
Displays the width and height dimensions of the montage. Depending on how the montage is displayed, the dimensions well update accordingly. The Arrangement drop menu lets the user select the scan method from which the images were acquired. Scanning methods include:

The Pixel Shift feature lets the user align scans by shifting individual rows or columns on a per pixel basis. Use the spin buttons to enter a value or type a value into the box. Positive values shift rows to the right and columns down. Negative values shift rows to the left and columns up.
Each frame can be separated from its neighbor by introducing a colored border. The images will be separated by the grid color and the montage will be surrounded by the background color. The Horizontal Spacing and the Vertical Spacing can be independently specified.
Checking this option may stream-line the performance of montage creation operations, depending on the image details and the computer system's hardware configuration. If checked, images will be loaded from the Data Document as a Montage is created, and cached in physical memory to speed the processing when the montage is recreated. This saves going back to the disk repeatedly, and is especially effective when a Region is applied.
The Montage Range setting for the Image Montage allows a partial set of images to be included in the final Montage Image. This can speed performance, reduce memory pressure when dealing with large image volumes, and also can provide a means to sub-sample the images in a sequence for example to show longer time events where neighboring images have little change.
Include all images (other inputs will be disabled)
Note: Changing any of the items will recompute the other items in the display.
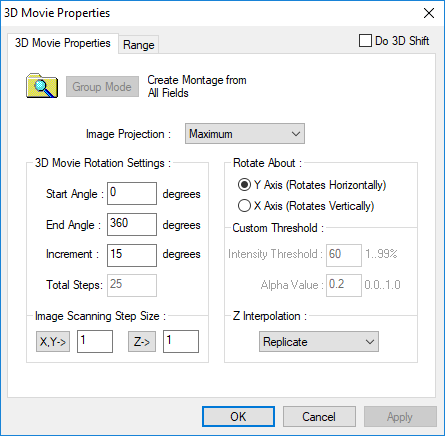
The Image Montage can be used to Create a 3-D Movie. The Montage can be used in Sequence mode to create an image, which combines all frames into a single view, for instance using the Maximum Projection.
To create a Movie, the same Sequence combination is used, but the images can be shifted during the combination to give a perspective appearance to the view. The 3-D Movie is created by making a series of combinations and saving the resulting images into a new Data Document which can be played using the Playback Toolbar.

The 3-D Movie is initiated from the right-click menu in the Montage View while the Field Image Montage node is selected in the data document or from the drop-down menu in the Montage toolbar. See Montage Menu for more details. A typical application for 3-D movies is to render a series of images collected with a time dimension or a Z dimension between each image. To create a 3-D Movie using the Montage controls, you will need to first create a maximum projection montage and then create the 3-D Movie.
